3. Setup
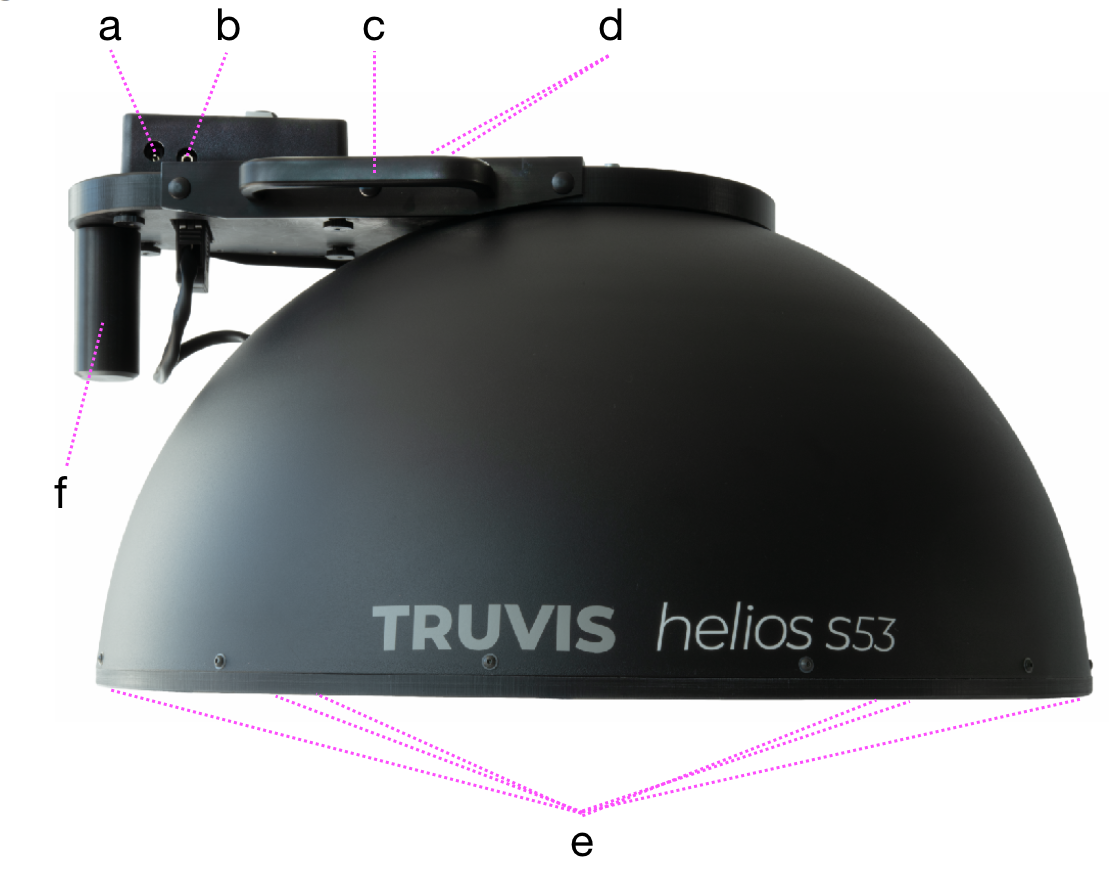
3.1 Unpacking and packing the lighting dome
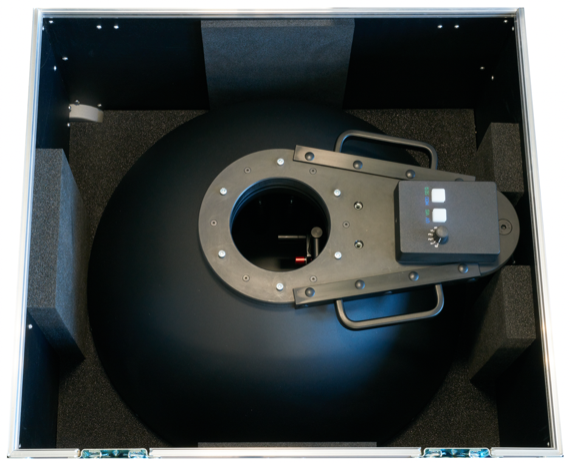
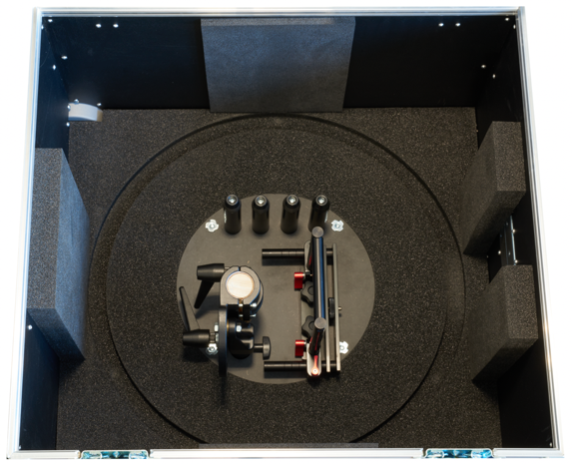
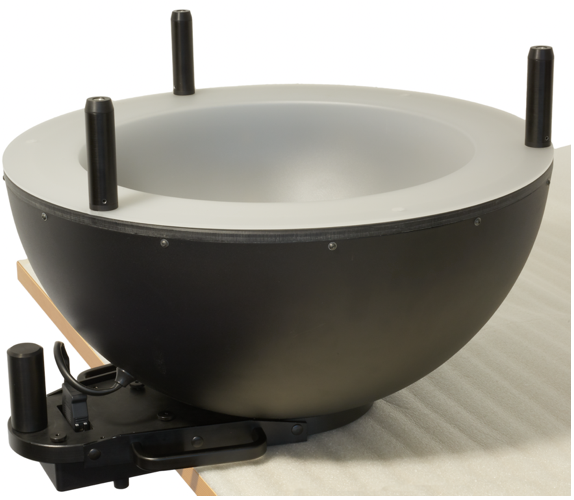
Open the transport box and remove the protective cover by loosening the two integrated screws. Do not reach into the lighting dome through the opening, but lift the lighting dome vertically out of the transport box using the handles [1c]. The accessories [2-5] are screwed to the bottom of the transport box.
Note
When packing the illumination dome, make sure that they are screwed tight and arranged as shown in Figure 3 (camera mount completely retracted, position of the locking lever of the tripod mount). Otherwise they can damage the lighting dome!
| Figure 1 | Figure 2 | Figure 3 |
|---|---|---|
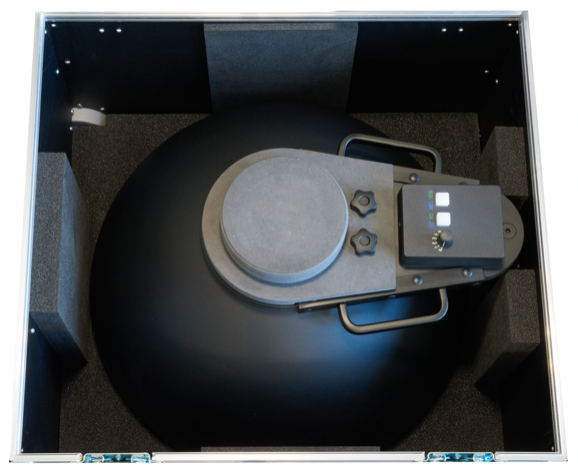 |
 |
 |
3.2 Setting up the lighting dome
The lighting dome can be used without the support legs, with the support legs or a tripod.
3.2.1 Support legs
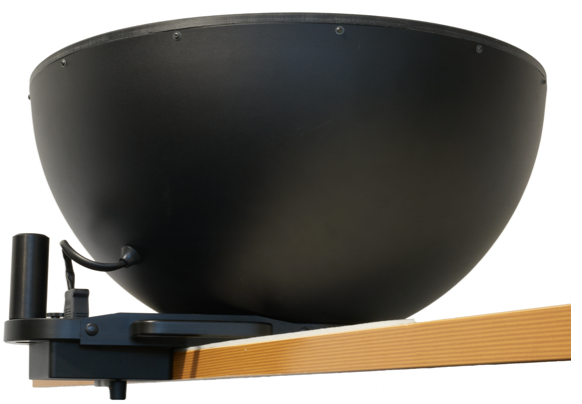
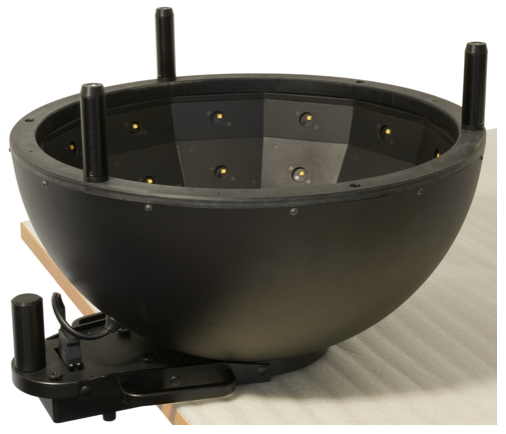
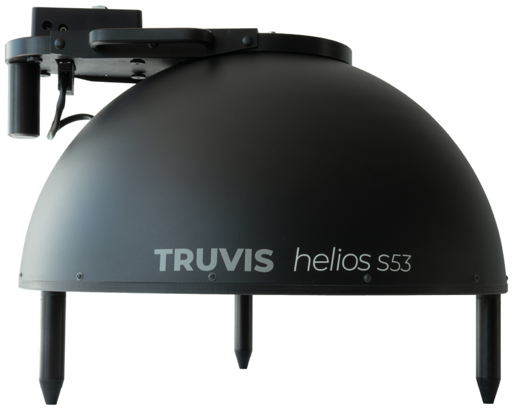
Place the lighting dome on a soft, non-slip surface on the edge of a table as shown in Figure 4. Be sure to slide the lighting dome as close as possible to the edge of the table. Now attach at least three support legs [3] to the screw threads [1e] provided for this purpose (Figure 5) and place the lighting dome upright on a stable, horizontal surface (Figure 6). Ensure that the lighting dome does not slip and, if necessary, adjust the height of the support legs by turning the support legs or support feet [4] such that the lighting dome stands parallel with the horizontal.
| Figure 4 | Figure 5 | Figure 6 |
|---|---|---|
 |
 |
 |
3.2.2 Tripod
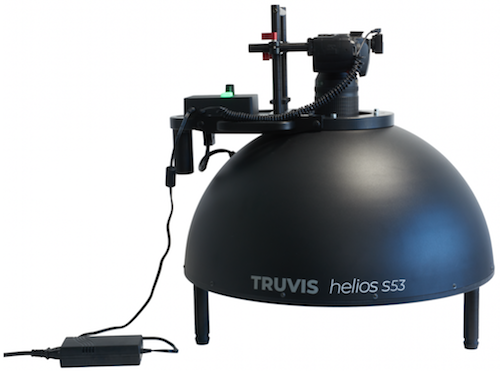
Attach the supplied tripod adapter [5] to the tripod bracket [1f] of the lighting dome (Figure 7). Lift the lighting dome onto a tripod using the handles and tighten the mounting bolt [5a] on the tripod adapter. Make sure that the tripod is also stable and secure it sufficiently to prevent it from falling over.
| Figure 7 |
|---|
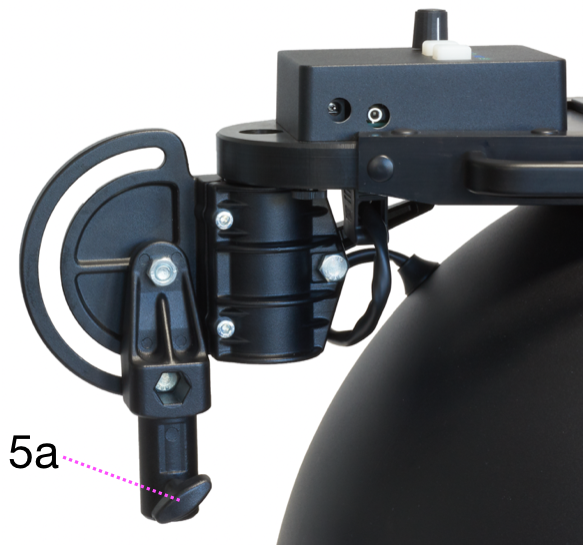 |
Note
Position the lighting dome such that the power supply cable is easily accessible and can be removed from the lighting dome at any time.
3.3 Attaching the diffusor
If you plan to use the optionally available diffusor [11], first place the lighting dome on a table edge as described in 3.2.1. Place the diffusor inside the lighting dome and, if using the support legs, secure the diffusor between the legs and the bottom edge of the lighting dome (Figure 8).
| Figure 8 |
|---|
 |
If you are using the illumination dome on a tripod, attach the diffusor to the lower edge of the illumination dome using the diffusor screws [12] supplied.
3.4 Mounting the camera
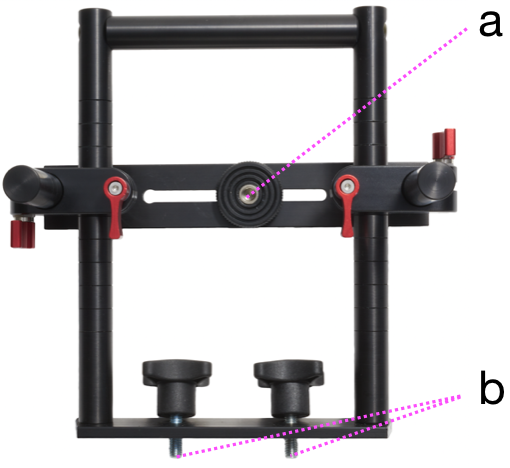
Fasten the supplied camera mount [2] with the integrated fastening screws [2b] to the screw threads [1d]. Then fasten the camera to the camera mount with the integrated screw [2a]. Adjust the position of the camera so that the lens is in the middle of the hole and flush with the inner edge of the illumination dome.
Note
The position of the camera may differ to a certain extent from the optimum position described above. However, this may lead to less than optimal results when generating RTI visualizations in the Authentica Creator Software.
3.5 Connecting the camera
If your camera does not have a PC-Sync cable connector, attach a hot shoe adapter with a PC-Sync connector to the camera's hot shoe. Now connect the PC-Sync connectors on the hot shoe adapter or camera and the lighting dome [1b] with the PC-Sync cable [8] provided. If you intend to control the camera using a capture software, connect the camera to your computer as well.
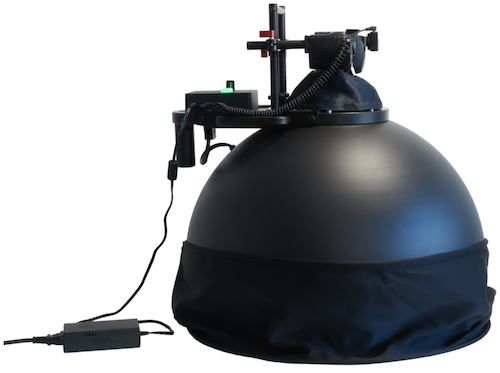
3.6 Attaching the light protection curtains
Attach the large light protection curtain [6] by placing it over the lighting dome and tightening the integrated elastic band. Fasten the small light protection curtain [7] by putting it over the camera lens and tightening the integrated elastic band. Make sure that the light protection curtains close tightly and that no ambient light enters (Figure 10).
3.7 Mains operation
Connect the mains adapter [10] to the mains adapter socket [1a] on the lighting dome. Position the lighting dome such that the power supply cable is easily accessible and can be removed from the lighting dome at any time. Then connect the mains adapter to the mains using the corresponding mains cable [9]. The backlight of the MOD/SEQ button will light up continuously in green and that of the UV/VIS button will flash green. To turn off the lighting dome, disconnect the power supply from the lighting dome.
| Figure 9 | Figure 10 |
|---|---|
 |
 |
![]()